
DIY Halloween decorations always catch my eye, but I rarely have time for complicated projects this time of year. Fall is a busy season for our family, between school schedules, activities, and early holiday prep. I still enjoy adding a few seasonal touches, but they need to be simple and worth the effort.
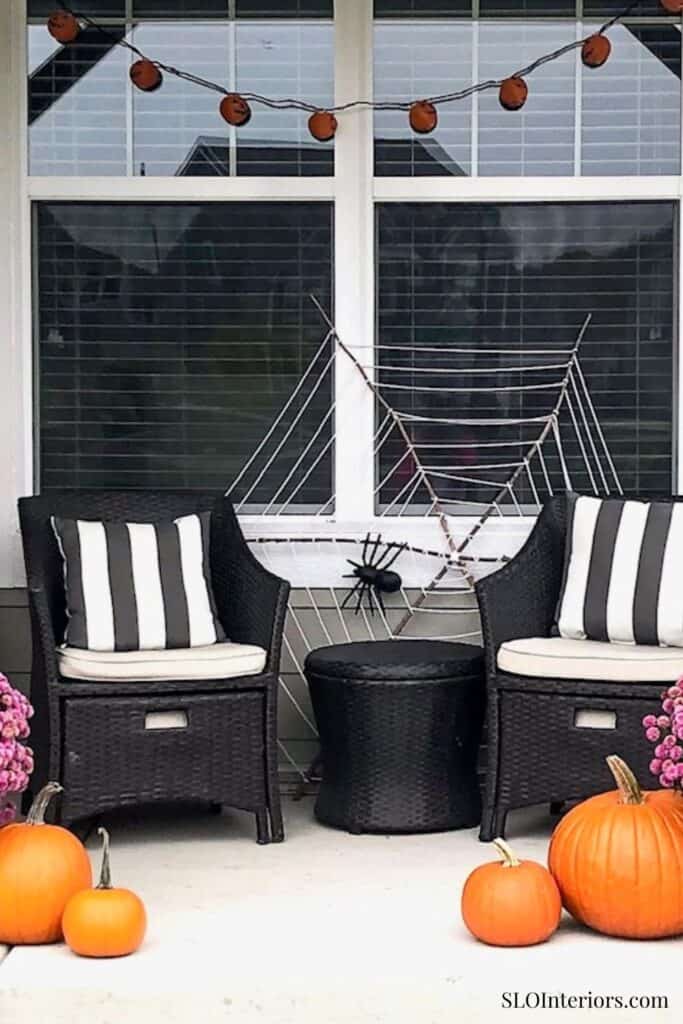
My kids look forward to decorating every year and usually fill the yard with spooky skeletons and plastic spiders. I wanted to add one piece that felt more intentional and helped tie everything together visually. After not finding anything similar in stores, I made this DIY Halloween spider web decoration using sticks, yarn, and one large fake spider for an easy front porch or yard display.
A Quick DIY Halloween Spider Web Project
This project stands out because it delivers strong visual impact without adding complexity to your seasonal setup. The materials are easy to find, the process is straightforward, and the finished result works seamlessly with other outdoor Halloween decorations. It is a simple way to bring in a touch of spooky decor without committing to a full haunted house look. It also fits easily into a full schedule since you can complete it in one sitting.
What You’ll Need
Materials
- Six sticks, each around 3 to 4 feet long
- White yarn
- One large fake spider
Tools
- Trimmer for cutting tree branches
- Scissors
- Hot glue gun and glue sticks
Before You Start
Before assembling, trim all sticks so they are roughly the same length, so the final web is balanced. Lay them side by side first, and adjust any that noticeably extend beyond the others so the frame feels even. This small step ensures the overall shape does not lean or feel uneven once installed near your front door or along your porch wall.
Set up your workspace in an area where you can spread everything out fully and step back to evaluate the shape as you build. A garage floor, patio, or driveway works well because you can walk around the frame from different angles. If you plan to use this with other outdoor decorations, place those nearby first so you can confirm the scale feels appropriate before you begin assembling.
Step-by-Step Instructions
Step 1: Arrange the sticks
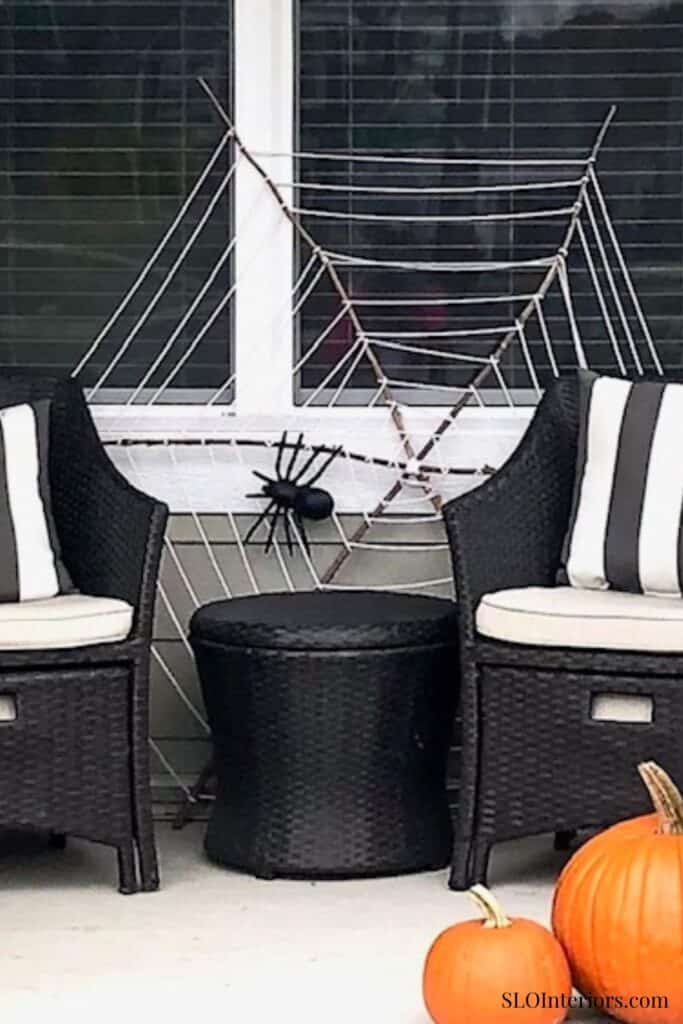
Lay the sticks so they overlap at the center, spacing them evenly to form a web frame that resembles spokes on a wheel. Start with two sticks crossing to form an X, then add a third and space them evenly. Stand above the layout and adjust the angles before moving forward, because this initial placement determines how the web will read once displayed on a front porch, against siding, or near front steps.
Step 2: Glue the center
Apply hot glue generously where the sticks overlap in the center, pressing each piece firmly into place so they bond together as one stable base. Allow the glue to dry completely, then carefully flip the frame and repeat the process on the back side to reinforce the structure. This step ensures the frame holds its shape when lifted or when tension is added during weaving, preventing the web from shifting out of alignment.
Step 3: Weave the yarn
Begin at the center by wrapping yarn over the glued area until it is mostly covered, then work outward in a circular pattern, looping the yarn around each stick as you reach it. Check as work to ensure that the spacing between sticks stays consistent. When the web feels complete, tie the yarn securely around the final stick, trim the excess, and add a small dot of glue to hold the knot in place.
Step 4: Attach the spider
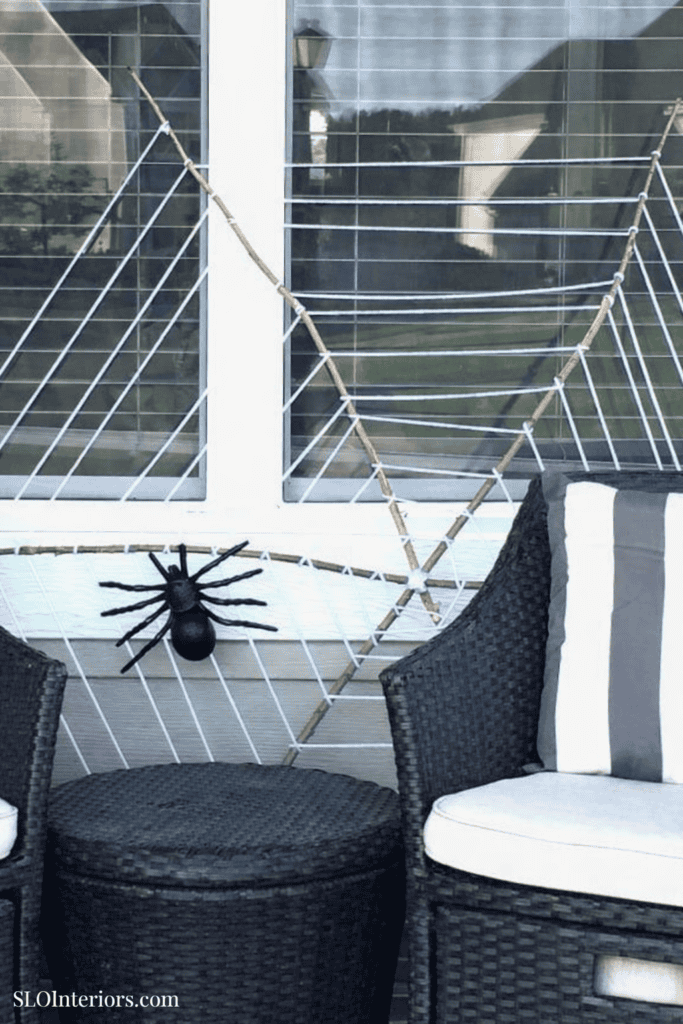
Choose a spot near one of the sticks to attach the spider. Ideally, the spider is overlapping the stick at a few points for stability. Use a few glue dots to attached the spider to the stick. This placement prevents the yarn from sagging and keeps the structure looking clean once displayed. Position the spider slightly off center at eye level for the most natural look, especially if the web is leaning against a wall or set within a larger display.
Styling A Halloween Spider Web
This web works well as a part of an existing set up or standing on its own. Tuck it slightly behind planters, lanterns, or pumpkins on your porch so it reads as a background detail that adds dimension. If you are planning a larger seasonal setup, you may also like this stacked pumpkin decor project. For larger spaces, place the web under a tree, against a fence, or beside grouped seasonal pieces to create a cohesive display. This placement helps anchor surrounding outdoor decorations so the entire area feels intentional rather than scattered. I have never placed my web indoors, but it could be used in a large area like an oversized foyer or as wall decor.
Tips and Variations
This project is easy to scale depending on where you plan to use it. A larger version works well outdoors, while a smaller version can sit neatly on a console table or hang on a wall without overwhelming the space. You can also adjust the level of detail depending on your overall decorating style. Adding one or two additional fake spiders near the outer edges creates a slightly more detailed effect while still keeping the design clean. Keeping additions minimal ensures the web maintains the right amount of visual balance and does not compete with surrounding decor.
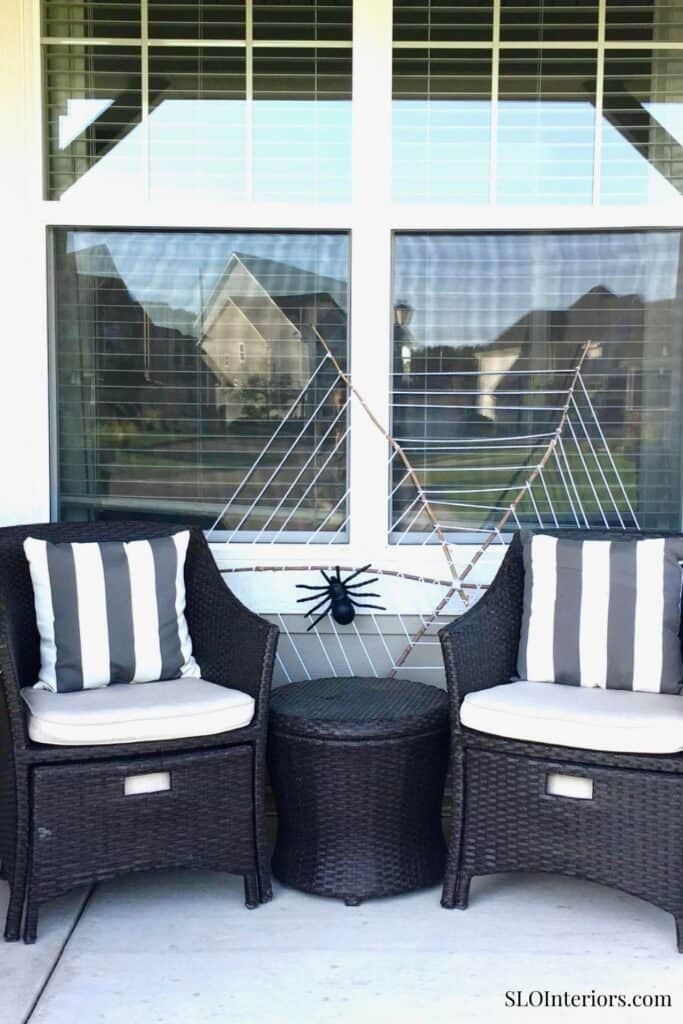
The Finished Halloween Spider Web Decoration
The finished web feels intentional and complete once styled into your space. The natural sticks add texture, the yarn defines the shape clearly, and the spider creates a focal point that reads immediately from a distance. The end result is an easy Halloween craft with impact. The kids will immediately notice it and it will draw compliments on Halloween night, especially when it is part of a front porch setup. It also works well within a larger display without requiring anything extra, blending easily with homemade Halloween decorations and helping tie everything together so the overall look feels considered and cohesive.
Fall is a busy season, which means decor projects need to stay simple. This spider web comes together quickly with few materials and minimal time, but still makes an impact. Whether you are styling a porch, setting up for a party, or just adding a small touch for the season, it fits in easily. It has enough presence to stand on its own without needing anything around it, but also works seamlessly with what you already have. It is the kind of fall decor you will return to year after year.