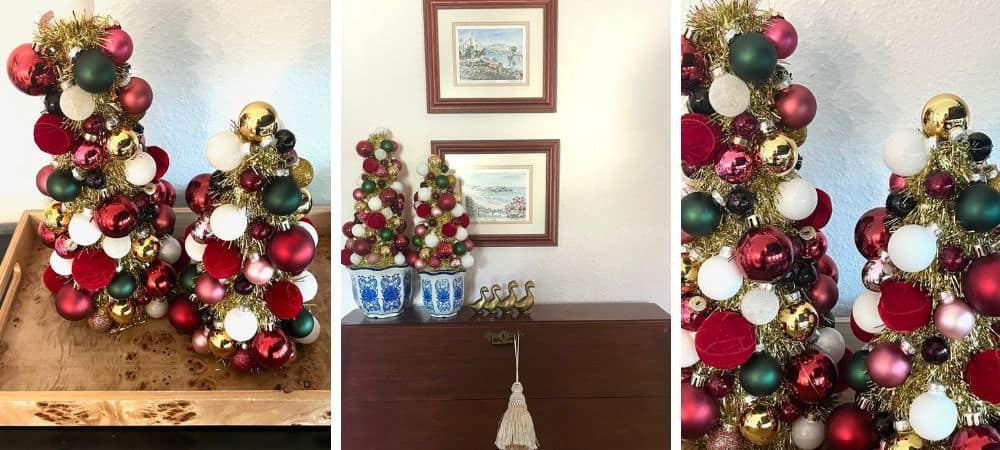
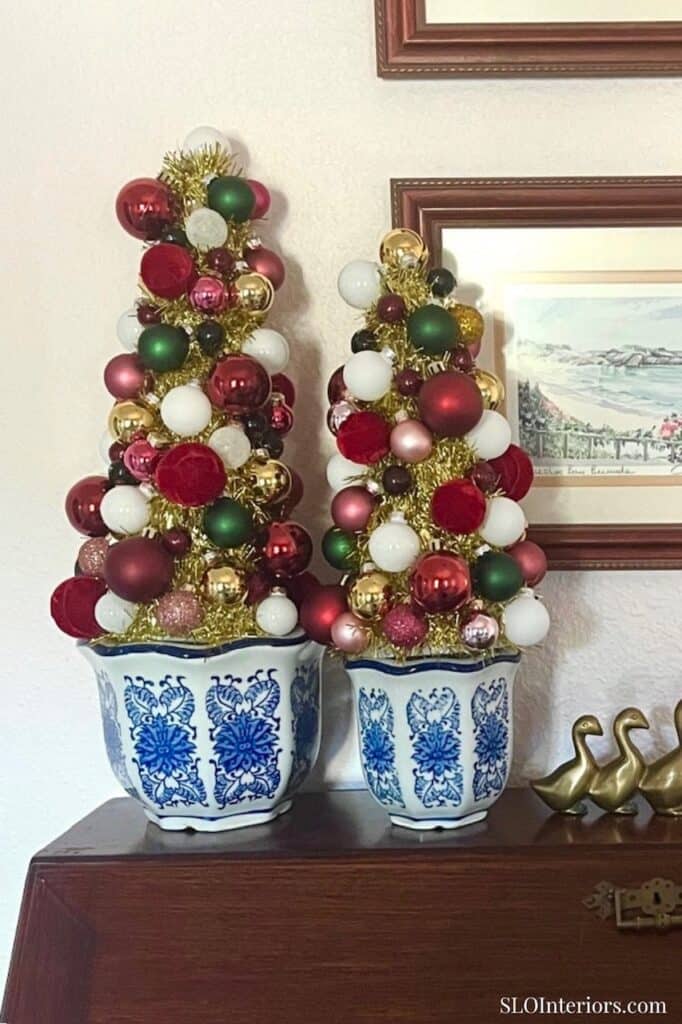
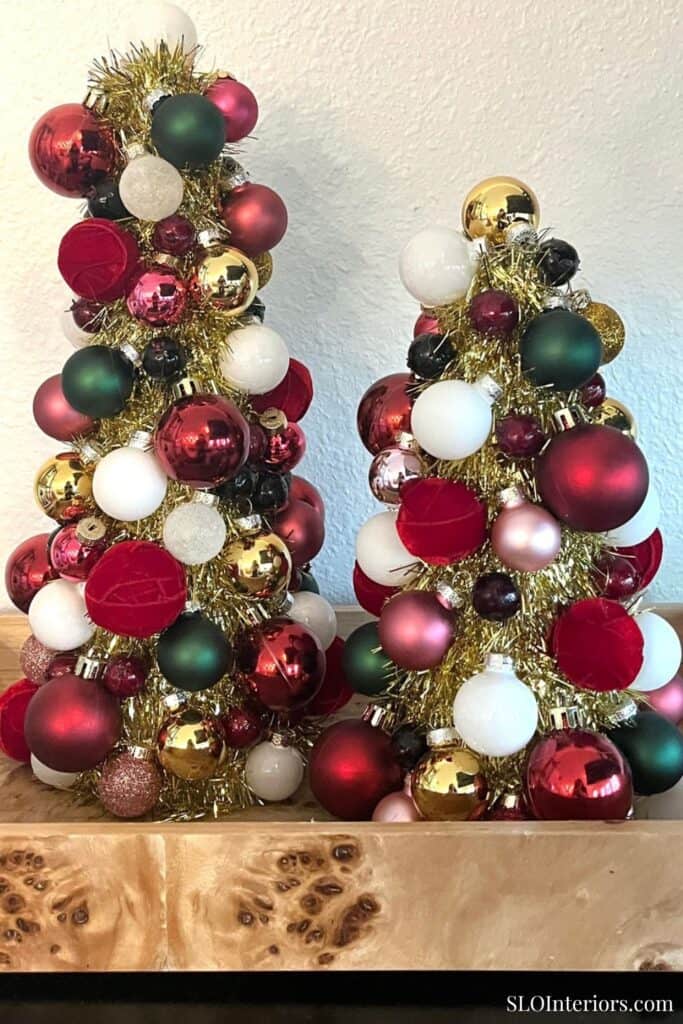
These ornament Christmas trees are a stunning addition to any holiday decor. I decided to make this as a DIY decor project because I wanted something elevated and customized to match my existing home decor. I couldn’t find what I wanted in the Christmas decor section at any retailers. The colors were off or the materials felt too cheap. The classic topiary shape was exactly what I wanted, along with the flexibility to place the trees on a flat surface, tray, or small cake stand. Similar versions are easy to find around the holiday season, but this felt like the perfect Christmas decor piece to make and customize myself to get the color palette and quality I was after.
A Polished Ornament Christmas Tree
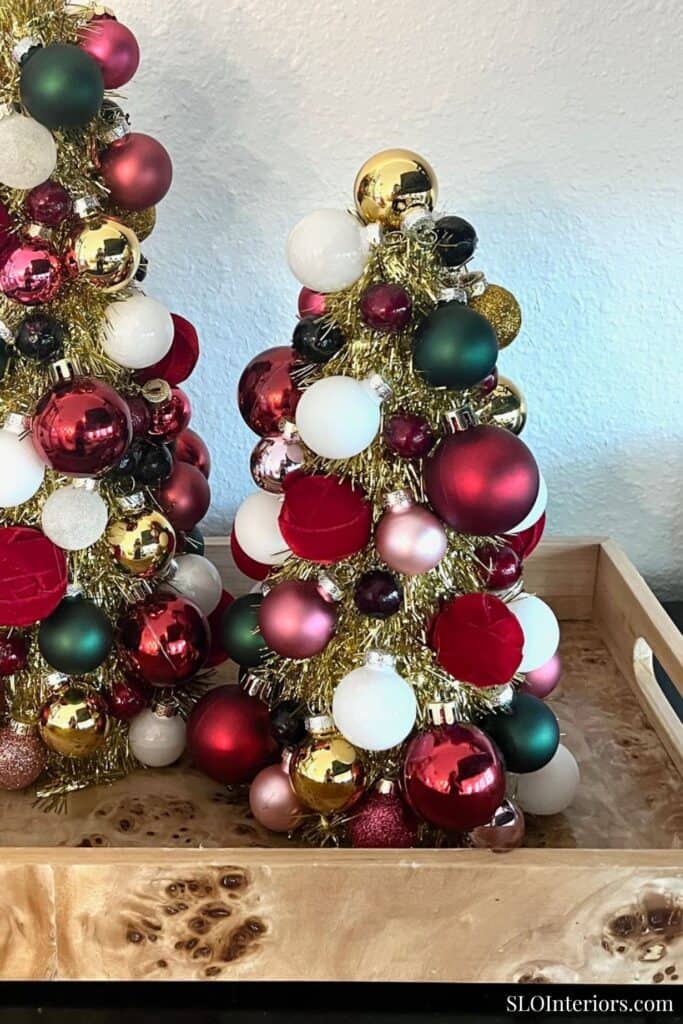
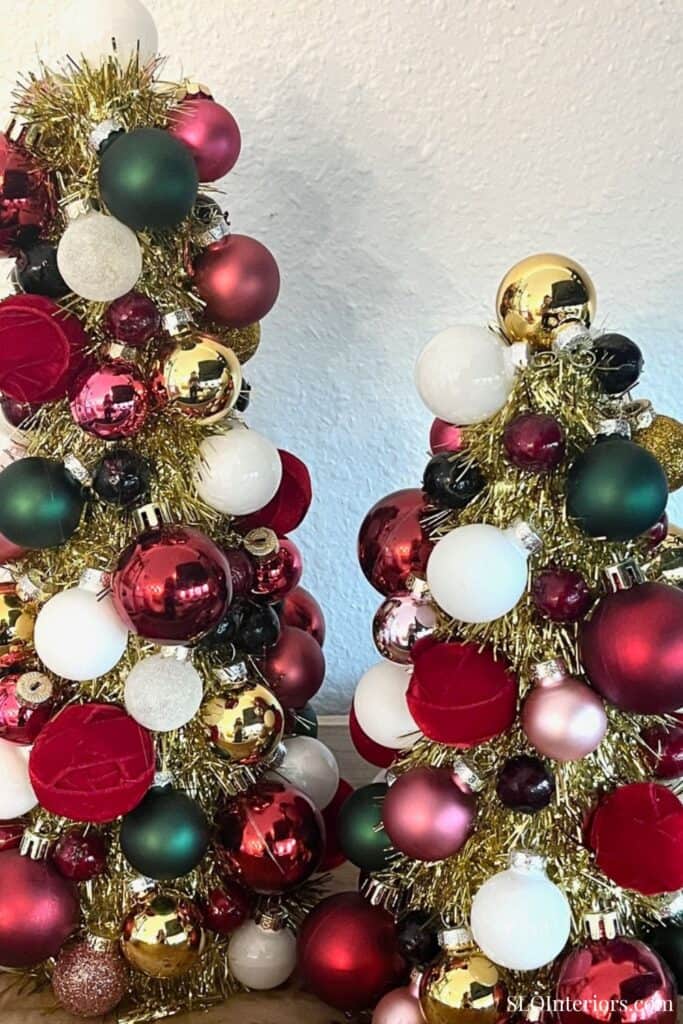
These are a classic decor piece to add to any Christmas decor style, and they are also incredibly affordable compared to what you can find in stores. The main cost is the mini ornament sets needed to make them. You can use glass Christmas ornaments, shatterproof ornaments, or ornaments made of other materials. I did a mix of all three on my trees. My favorite part of this project is the customization. I made these to match my pink and green office, and the colors coordinate perfectly. I selected a classic red, dark green, and gold palette with pink and white accents.
What You’ll Need
Materials
- Foam cones
- Mini ornament sets
- Mini tinsel garland
Tools
- Hot glue gun and glue sticks
Before You Start
Clear an area to work where you can easily reach an outlet for the glue gun. These take a little time to put together, so I like to sit at a desk, counter, or table and get everything set up first. Lay out the supplies, then play with the ornament placement a bit to see what colors and sizes work well together and what you want to avoid placing together before you start gluing. If you are using a mixed color or size Christmas ornament set, sort the ornaments by color and size before you start.
How to Make an Ornament Christmas Tree
Step 1: Attach Tinsel Garland
Working from the bottom of the tree to the top, glue the tinsel garland onto the foam cone using small dots of glue every few inches. Too much glue can melt the tinsel, so it helps to use just enough to hold it in place. Once you reach the top, trim any remaining garland. Some versions add the tinsel at the end to fill gaps between the ornaments, but I prefer to add it first because it covers the cone better as a base layer.
Step 2: Glue Ornaments
Once the tinsel is in place, begin gluing the ornaments on from the bottom up, working in a circular motion as you go. Add a small dot of glue, then press and hold each ornament until it sets. It may take a little trial and error to find the right amount. Too much glue takes longer to dry, and too little will not hold the ornament in place. For the best hold, move some of the tinsel aside and attach the ornaments directly to the foam cone.
Step 3: Ornament Placement
If you are working with multiple sizes of ornaments, place the larger ones first throughout the tree, then fill in with the smaller ornaments. That keeps the larger ones from clumping together and helps the overall shape stay balanced. Do the same with similarly colored ornaments of varying sizes to make sure you don’t get too many of the same color in one area.
Ornament Christmas Tree Styling Ideas
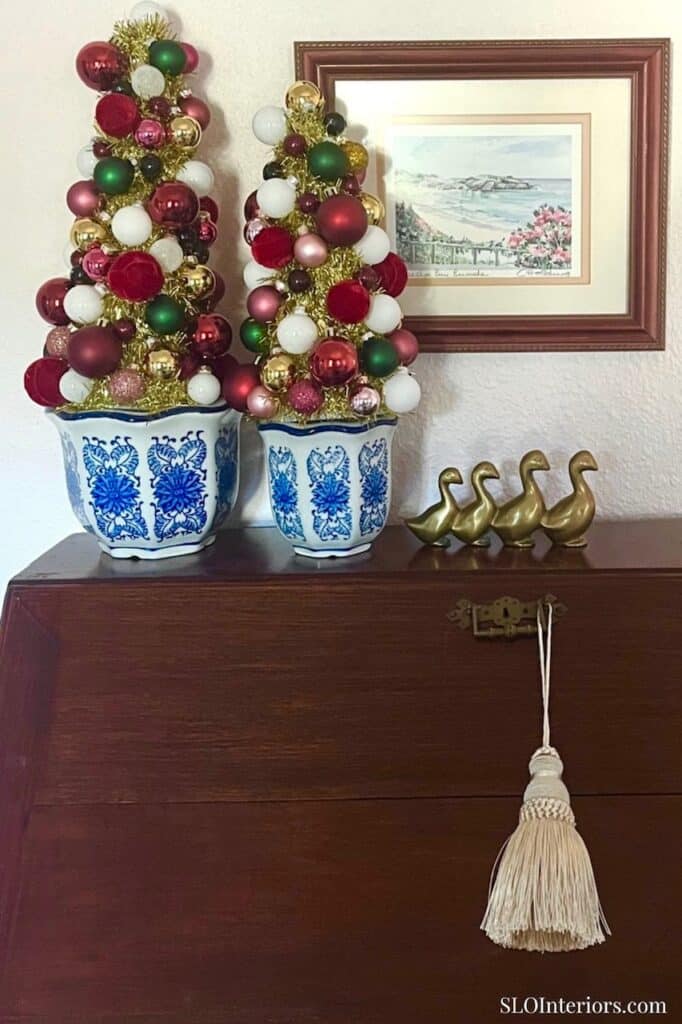
These trees work beautifully in any room and are easy to layer into existing Christmas decor. They are especially striking on mantels, console tables, and entry tables, and they also work well as part of a dining table centerpiece. In a kitchen, they look charming on a small cake stand or styled with a few other holiday pieces. They are just as fitting on a bathroom shelf or bedroom dresser. Whether you make one tree or a grouped arrangement, they bring in holiday spirit without taking up much space. For another ornament project, this colorful Christmas ornament wreath brings the same color, shine, and classic holiday style into your holiday decor.
Custom Ornament Christmas Tree Ideas
This is a versatile DIY decor project because the scale and ornament mix are easy to adjust. Different foam cones let you vary the height, which makes a grouped arrangement with tall trees and small trees feel more intentional. Ornament sets are an easy and affordable way to purchase supplies for this project and achieve a cohesive look, but you can also layer in single ornaments. The color palette can be tailored to your space, whether you want something traditional or more current. You can use classic glass ornaments, shatterproof ornaments, or a mix of both, and small decorative accents can bring in a stronger theme if that suits the rest of your Christmas decor. As long as the palette stays consistent, the finished tree will still feel cohesive.
Classic Ornament Christmas Trees
This ornament Christmas tree has the polished look of store-bought holiday decor, but feels more personal because you can choose the exact colors and materials yourself. The classic topiary shape gives it a clean, finished look, while the ornament mix makes it easy to match your existing Christmas decor. It is simple enough to finish in an evening, polished enough to bring out year after year, and a smaller version also makes a great gift with a personal touch. The finished tree is a classic way to bring extra color, shine, and holiday style into your Christmas decor.