
Mini topiaries are an easy way to make a space feel more finished. They bring shape, softness, and a touch of greenery to shelves, counters, and small corners that need a little character. This DIY version has the same classic feel you can find in high-end home decor stores, but it is easy to make at home. It is especially nice if you want something polished that does not take up much space, since a pair of small trees can work on shelves, in the kitchen, or on a console table. They are just as useful in everyday indoor decor as they are in more styled spots, and they are a smart option if you love the aesthetic appeal of real plants but do not want the upkeep that comes with them.
A Simple Project with Lasting Style
One of the best things about this project is how timeless these mini topiaries feel. The look is classic, the supplies are simple, and the finished result feels thoughtful without being fussy. If you like decor that can be styled once and then lived with for a long time, this is a perfect solution. It is also a budget-friendly way to get a custom look. Vintage pots make these feel more personal, and displaying them as a pair gives the arrangement a little more presence. Even if you do not have a green thumb, this is still an easy way to bring in the charm of greenery with none of the maintenance.
What You’ll Need
Materials
- Two small faux boxwood or other greenery balls
- Small wood dowel
- Brown acrylic paint
- Floral foam
- Faux moss
- Pair of matching pots
Tools
- Trimmer to snip the dowel in half
- Dull knife to cut the floral foam
- Small foam brush or paintbrush
Before You Start
Before you begin, it helps to decide how tall you want the finished trees to be. That will help you know whether to cut the dowel exactly in half or make each piece a little shorter. It is also worth checking that your greenery balls and pots feel balanced together, since the overall proportion is what gives these their polished look.
If you are using thrifted pots, give them a quick wipe and set everything out before you start assembling. Having the greenery balls, foam, moss, and painted dowels ready to go makes this project move quickly. Once everything is laid out, the steps are very straightforward.
Step 1: Paint and Cut the Dowel
Start by painting the wood dowel brown so it looks natural with the greenery ball and moss. This small detail helps the finished topiary look more realistic and keeps the center support from standing out. Let the paint dry fully before moving on to the next step.
Once the paint is dry, cut the dowel in half with your trimmer. You can also trim it a little shorter if you want a lower, more compact shape. The height is easy to customize, which is part of what makes this project so flexible.
Step 2: Cut the Floral Foam to Fit the Pots
Use a dull knife to cut the floral foam so it fits snugly inside each pot. You want the foam to sit securely without wobbling, since it will support the dowel and greenery ball. Take your time here, because a good fit makes the rest of the project much easier.
Press the foam into the pot and check that it sits just below the top edge. That gives you room to add moss later without making the pot look overfilled. Once both pots are ready, the structure of the project starts to come together very quickly.
Step 3: Assemble the Topiary Trees
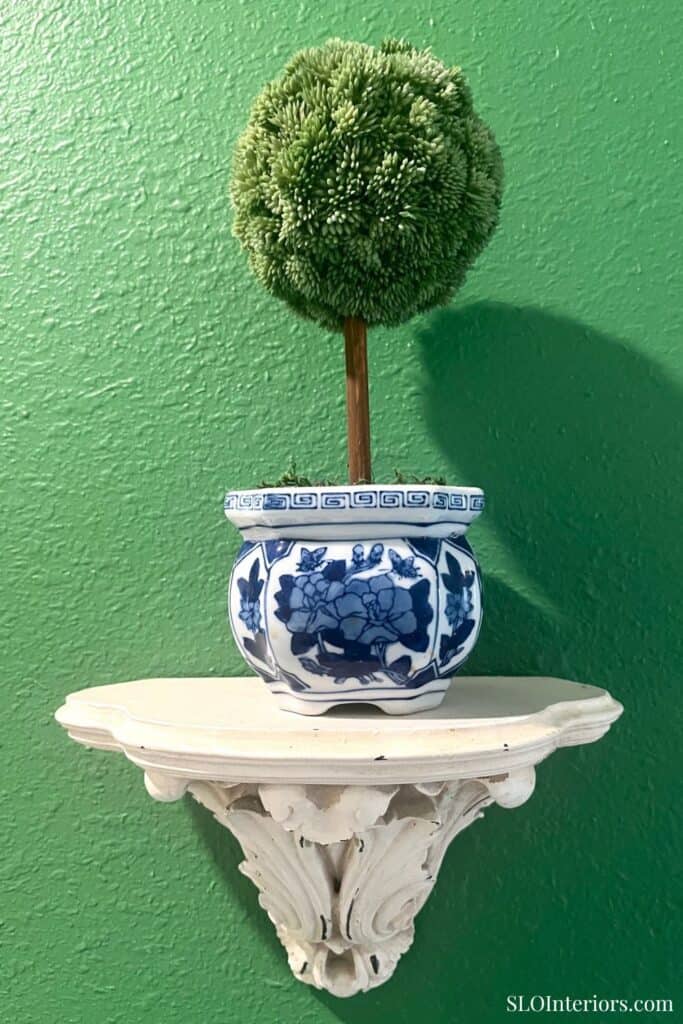
Push one greenery ball onto the top of each painted dowel. Then insert the dowel into the floral foam in the pot, pressing gently until it feels stable. At this stage, you can step back and check the height before moving on.
This is also where you can change the overall look depending on the greenery you use. Traditional round forms create the look of classic boxwood balls, but other greenery balls can feel softer or slightly more relaxed. If you like boxwood topiaries, this is a perfect choice for getting that look on a smaller scale.

Step 4: Finish with Faux Moss
Once the topiary is standing in place, cover the exposed floral foam with a small amount of faux moss. Tuck it in gently until the surface looks full and finished. This step softens the base and helps the topiary feel more complete.
The moss also gives the project a more natural transition between the pot and the greenery ball. It is a simple finishing touch, but it makes a big difference in the final result.
Styling Ideas for Mini Topiaries
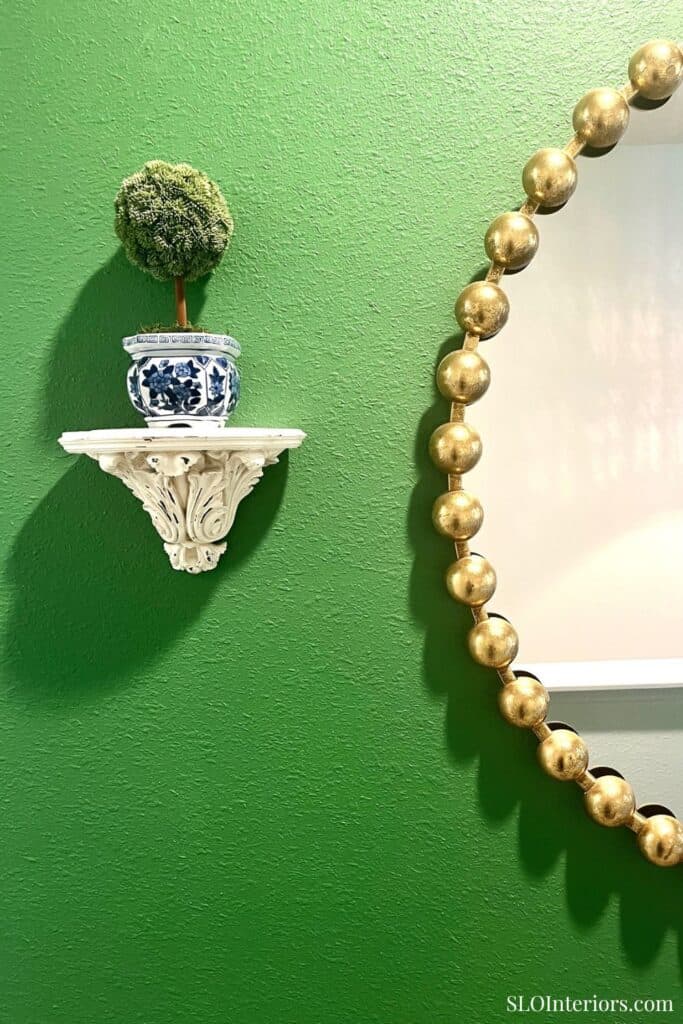
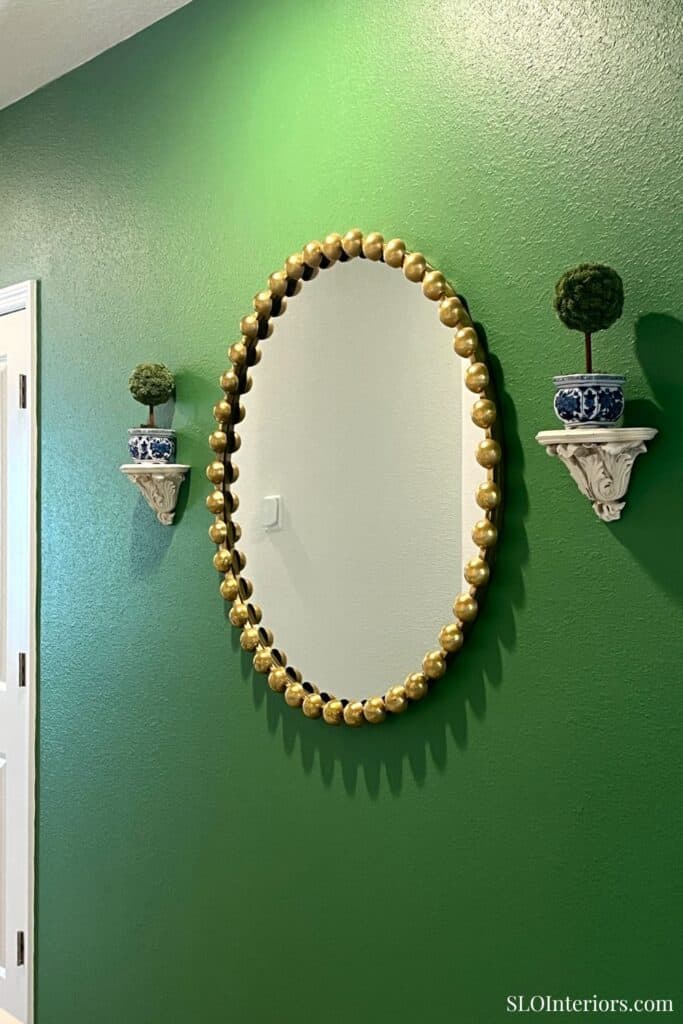
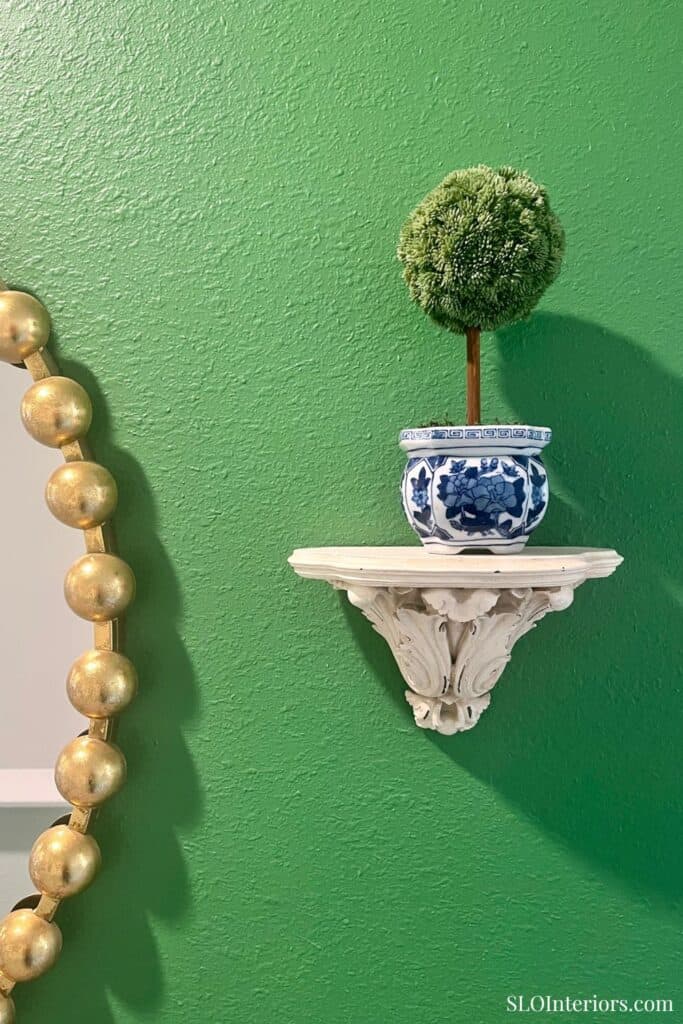
I especially like these displayed on a matching pair of shelves, where they can add balance without feeling too formal. They also work beautifully in the kitchen, on open shelving, or grouped into a small arrangement on a sideboard. Because they are compact, they are useful in spots that need detail but do not have room for anything large.
The timeless look of these topiaries makes them easy to use year after year. A blue and white planter gives them a traditional feel, while a simpler vessel can make them blend into a wider range of styles. They are a nice way to create the feel of a collection of artificial topiaries without spending much or filling the house with too many things.
Tips and Variations
This project is very easy to customize. You can swap the greenery ball for another shape or material, use a different type of pot, or adjust the height depending on where you plan to style them. That flexibility makes it easy to create a unique style that suits your home.
I did not use true boxwood here because I already have it elsewhere in the house, but these would look beautiful made from other faux plants or even small floral balls. The goal is not to make the perfect artificial topiary, but to create something classic and useful that feels at home in your space.
Finished Project
These mini topiaries are the kind of DIY that earns its place because they are quick to make and easy to enjoy for years. They bring a finished look to a shelf or counter, and they do it in a way that feels timeless rather than overly seasonal. For anyone who likes classic decor with a little personality, they are a simple project with lasting appeal.