
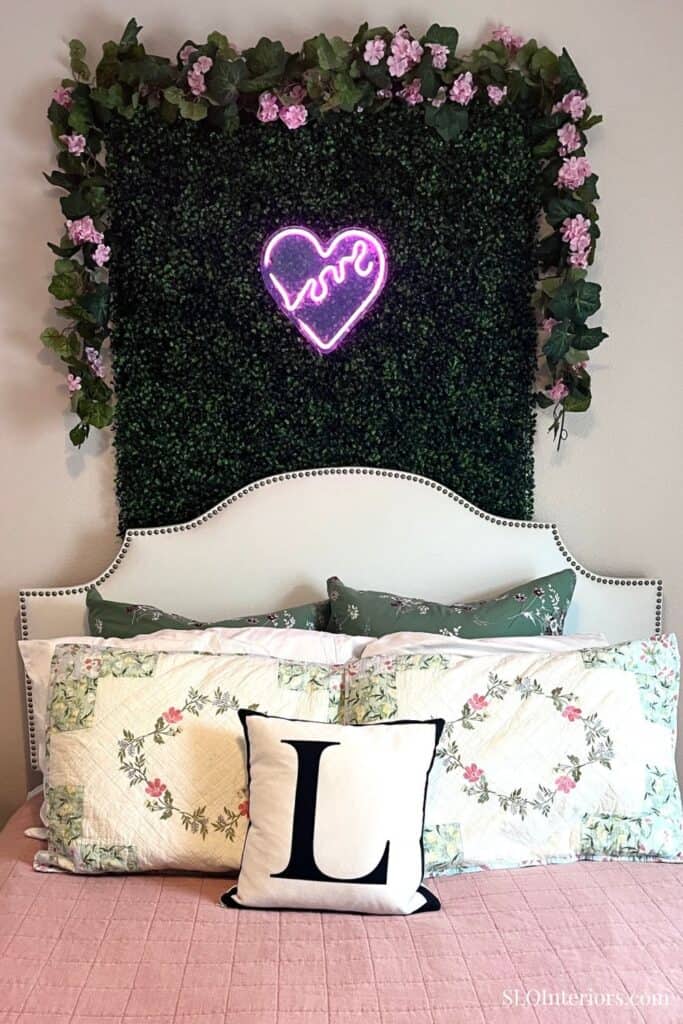
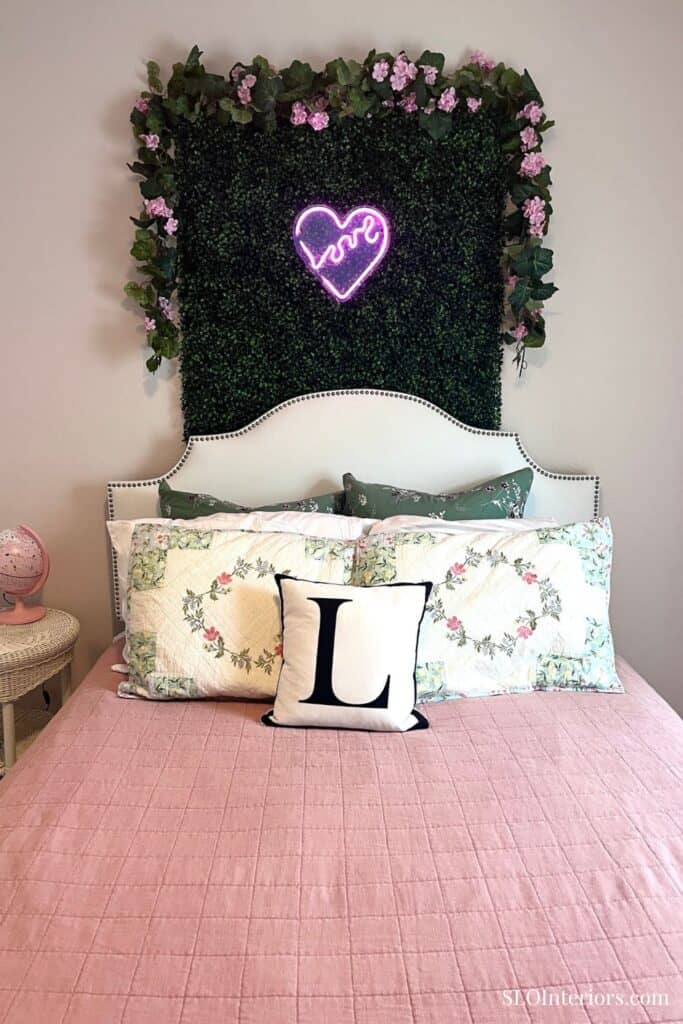
Floral wall decor is a pretty way to make a girls bedroom feel more colorful, personal, and styled. This boxwood floral wall was inspired by a display we saw at a retailer, and it felt like a fun way to refresh the vintage wall art I have had in my daughter’s room since she was a baby. It builds on the original floral prints in the space, but turns them into something more elaborate with more color, texture, and visual interest. The finished look feels sweet enough for a little girls bedroom, but polished enough to grow with her as she gets older.
Before the Floral Wall Decor
The wall above my daughter’s bed previously had a pair of vintage style art prints from Etsy. These have been in her room since she was a toddler. The frames were older pieces that started out white, but I spray painted them gold to better fit the space. She had been asking for a big girl update to her room, so this felt like the right time to create a more layered version of the original floral wall decor. I’m keep the prints to use elsewhere as they are one of my favorite wall art pieces I’ve pulled together.
You can see a photo of the original space below, and the full room in my little girl bedroom decor ideas post.

Why You’ll Love This Project
This floral wall art is a good project when you want something with a lot of visual impact, but do not want to track down complicated supplies. The boxwood panels, flowers, and garlands are affordable and easy to find, and the whole idea can be adjusted to fit the colors and style of the room. I like coordinating the flowers and garlands with the existing room colors so the finished wall feels custom, cheerful, and connected to the rest of the space.
What You’ll Need
Materials
- Faux boxwood panels – set of 6 from Amazon; we used 4
- Floral garlands – I used 2
- 3M hooks
- LED light of your choice – my daughter already had this hanging in her room
Before You Start
Start by laying out the panels and garlands so you can plan the spacing and overall layout. We used my daughter’s bed and the floor in her room to arrange everything. The panels have some weight, so make sure your 3M hooks can support them. I used multiple smaller hooks for the panels and two larger hooks to drape the garlands.
How to Make a Boxwood Floral Wall
Step 1: Connect the Faux Boxwood Panels
The set of boxwood panels comes with zip ties. Start by laying out the number of panels you want to use in the configuration you want on the wall, then flip them over and attach them into a square using the zip ties. I left the bottom two sections open so I could thread the LED light cord through the gap and keep it hidden.

Step 2: Hang Panels on the Wall
Attach hooks to the wall where you want the panel to hang. I had my daughter step back and check the positioning a few times before securing the hooks. This becomes a focal point in the room, so it is worth taking a minute to get it centered and balanced in the space.
Step 3: Drape the Floral Garlands
Once the boxwood panel is hung, place a larger 3M hook at each of the top corners. Drape the two floral garlands across the top and down the sides. I twisted the center of the garlands together slightly at the top to help them lay more naturally.
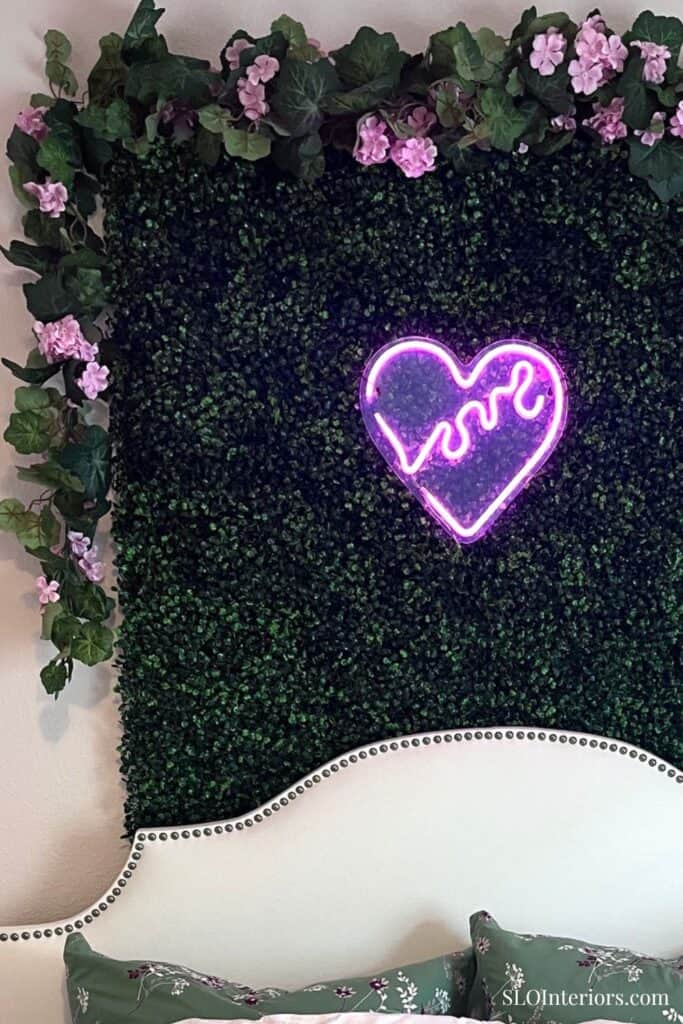
Step 4: Add the LED Light
My daughter’s LED light had predrilled holes on each side, so we used zip ties to attach it directly to the boxwood panels. You could also secure it to the wall with screws.
Different Ways to Style a Boxwood Floral Wall
This can be used across different spaces depending on how you style it. In a kids room, it can replace a gallery wall and create a larger focal point without needing multiple frames. It also works well in a play space or as a party backdrop, especially for an outdoor setup. The lighting can shift the look as well. Twinkly lights give it a softer feel, and the LED light can be removed or swapped depending on how you plan to use it.
Customize a Boxwood Floral Wall
There are a few simple ways to change the look of this depending on the style you want. The color palette is easy to adjust based on the flowers and garlands you use. The background panels can also be swapped for turf or faux grass if you want a different base. For a more detailed look, you could use individual stem flowers instead of garlands. A name or monogram can also be added with wood letters from a craft store.
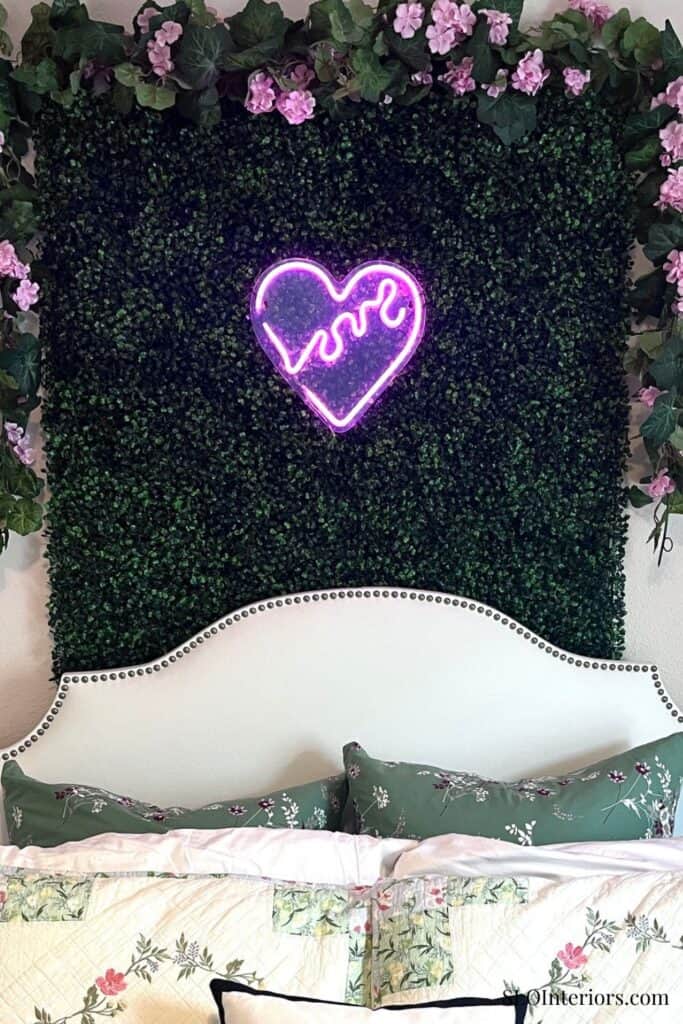
The Finished Boxwood Floral Wall
Floral wall decor is a project that makes a girls room or play space feel instantly more styled. It is a great wall art option that comes together quickly with simple steps and easy to find supplies, and the overall look can be customized to fit your space. The finished wall is a more unique addition than typical art. More traditional pieces can get expensive quickly and often feel too themed. This is an affordable DIY decor project that can grow with the space over time.