
Fabric wall art is a timeless way to add character to your walls, especially when it is hard to find artwork that truly suits your space. Creating your own custom piece is a simple way to get the look, color, and scale you want without relying on what is available in stores. This DIY decor project uses basic, affordable supplies, but the finished result is thoughtful and personal. Fabric brings in an unexpected layer of pattern and softness that adds style and character to a room. It is a practical way to create something tailored to your home.
What You’ll Need
Materials
- Fabric
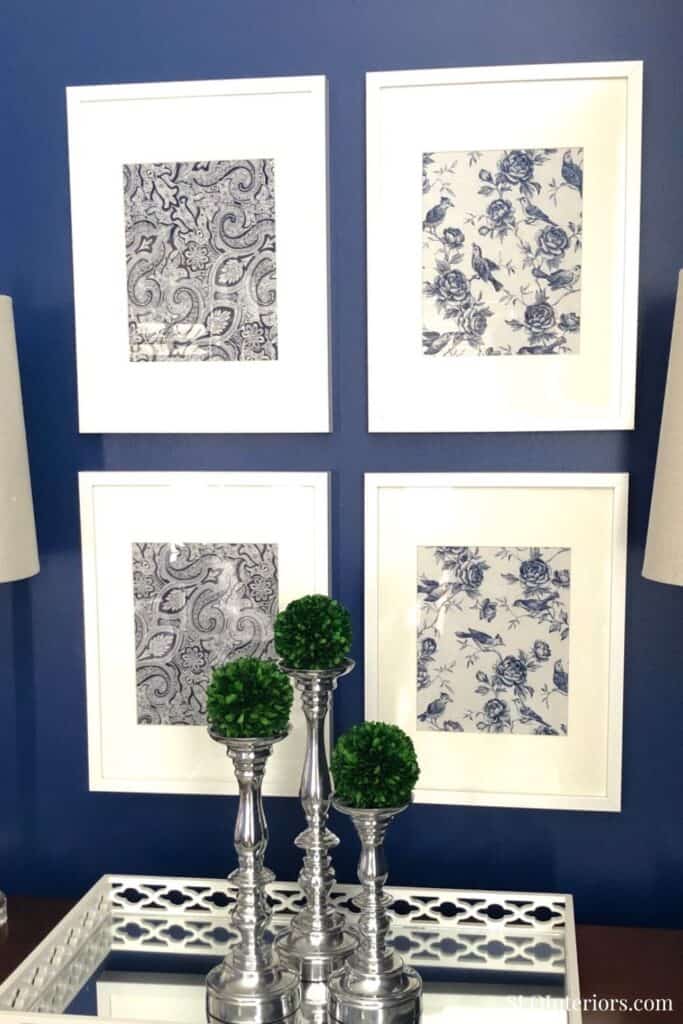
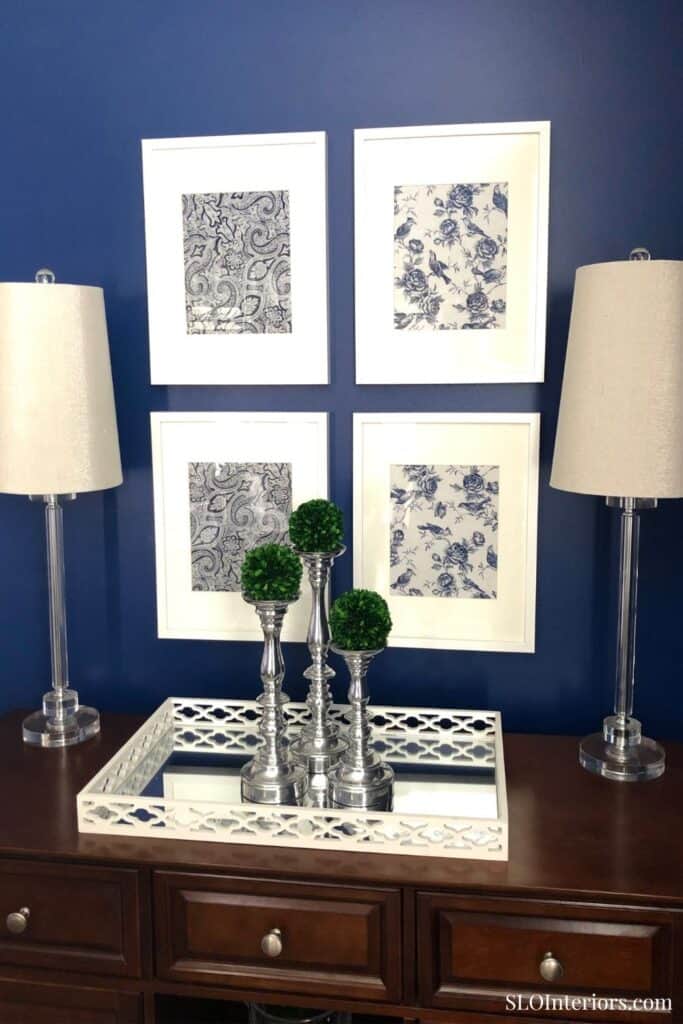
- A set of frames to fill your wall space – I used four 8×10 frames
Tools
- Fabric scissors
- Scotch tape
- Pencil
Before You Start
Define and measure the wall space you want to fill so you can choose the right frame layout from the beginning. Three frames work well in a horizontal arrangement, while four in a grid can be a great fit for a space like mine. Simple frames tend to work best because they keep the focus on the fabric, so basic white, gold, silver, black, or a wood tone are all good options. Matted frames are important for this project because the mats help anchor the fabric and give the finished pieces a more polished look. Make sure your scissors are sharp enough to cut the fabric neatly.
How to Make Fabric Wall Art
Step 1: Determine Fabric Placement in Frames
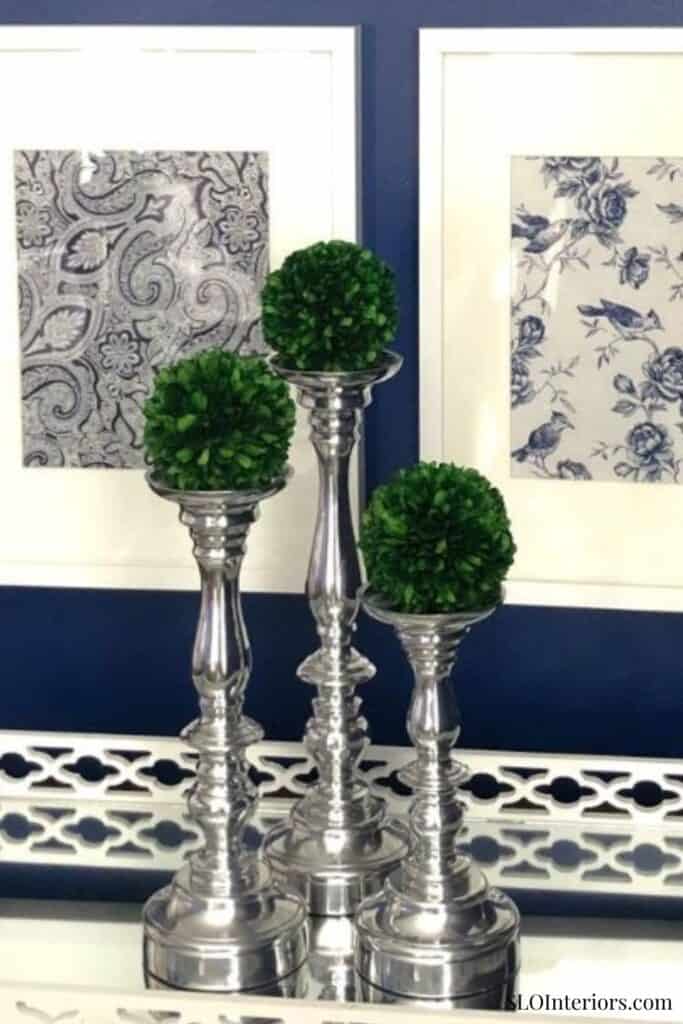
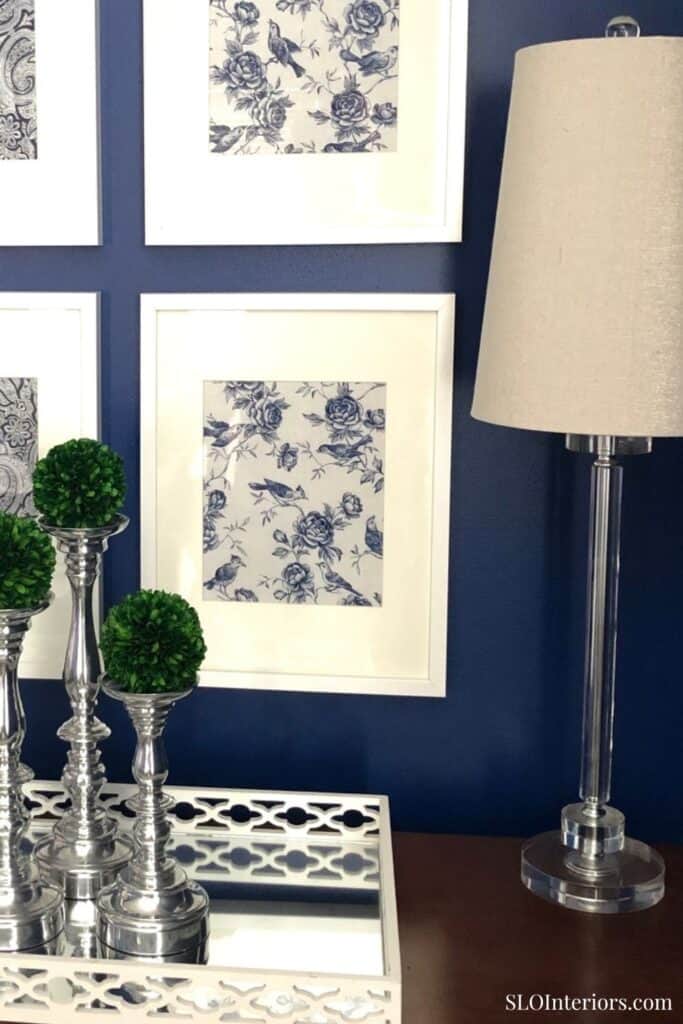
Start by laying out your fabric and deciding how you want each piece to be positioned in the frames. I used two different fabrics in the same color palette to fill four frames, which gave the arrangement a little more variety while still feeling cohesive. Remove the back of one frame and place the mat over the fabric so you can experiment with which part of the pattern you want to highlight. Once you find a placement you like, trace around the mat with a pencil onto the fabric.
Step 2: Cut out Fabric
Cut out the section you traced in step one, keeping the edges neat. Repeat the same process until you have enough fabric pieces cut to fill all of your frames.
Step 3: Position Fabric in Frames
Open each frame and remove the mat before placing the fabric pattern side out against the back of the mat. Once it is centered the way you want it, tape the corners in place with Scotch tape, make sure the fabric stays smooth and does not wrinkle. Place the mat back in the frame and secure the frame backing.
Step 4: Hang Fabric Wall Art
Hang the finished frames in position on the wall, adjusting the spacing until the arrangement feels even. If you are using 8×10 frames like I did, I have found that small nails provide the most secure hold. Once they are hung, the finished arrangement has the look of a simple, custom gallery wall.
Textile Wall Art Styling
Pattern and color choices are what create the final look of this project. Crisp prints like small florals, stripes, and plaids tend to feel the most timeless. Monochromatic patterns or prints with just a few colors create the most classic effect. This type of wall decor can work beautifully in a dining room, living room, or bedroom, depending on the fabric and the overall mood of the space. I created this as another wall decor idea for my colorful formal dining room, where I wanted more pattern, color, and softness on the walls. The right fabric adds visual interest without being too busy and keeps the room polished.
Fabric Wall Art Tips
There are several ways to adjust this project depending on the look you want. More ornate frames can work beautifully here, but the detail in the frame should match the scale of the fabric print. A smaller print can get lost in a highly detailed frame. Instead of using a repeating pattern, you can choose a fabric with a larger focal point, like a bold flower, and frame different sections of the design. Abstract, colorful, or more playful fabrics can take this project in a completely different direction, rather than keeping it timeless or classic. You can also use vintage mismatched frames to add another layer of detail to a focal wall.
Custom Fabric Wall Art
It’s easy to create your own custom fabric wall art to match your decor, especially when you are not finding options you like in stores. Fabric adds an unexpected element to the wall and brings in softness and pattern in a different way than traditional art. The supplies are affordable and easy to find, which makes the project easy to put together. The finished focal wall adds a personal touch to your decor and can stay in place for years or be easily swapped out as your taste changes.